Creating a SEF file for an X12 guideline with the SEF Manager
Steps:
-
Launch the SEF Manager
-
From the menu, select File, then New
-
Select "ASC/X12"
-
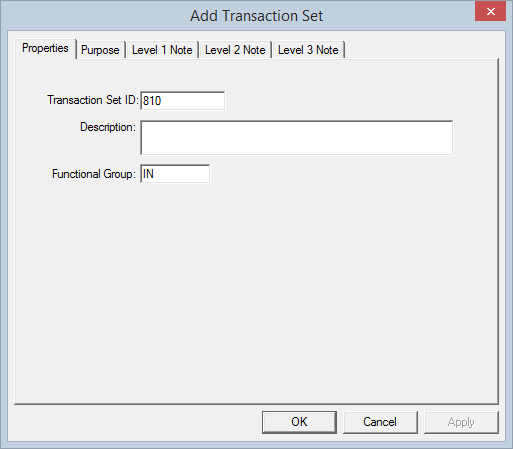
Enter its Transaction Set ID and Functional Group code.
-
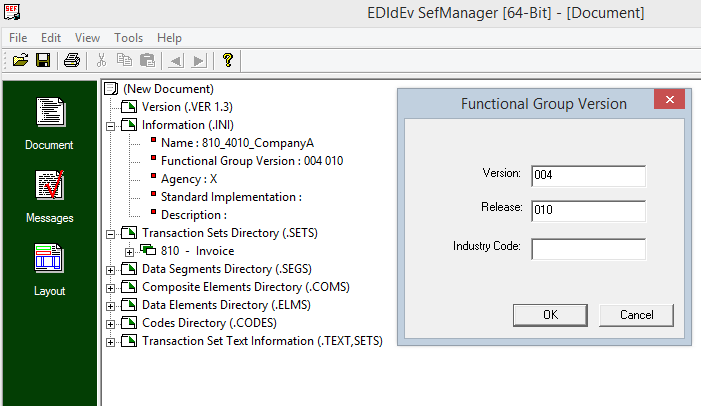
Modify the Information (.INI) section. Make certain to enter the correct version of the guideline e.g. 4010
-
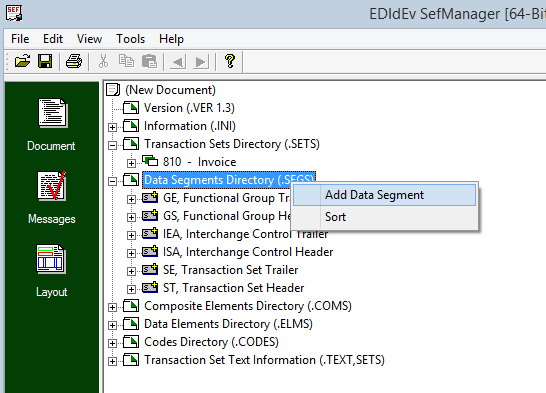
Create all the data segments in the Data Segments (.SEGS) Directory that are required in the Transaction Set. To create a data segment, right click on the Data Segment Directory (.SEGS) node, then select “Add Data Segment”.
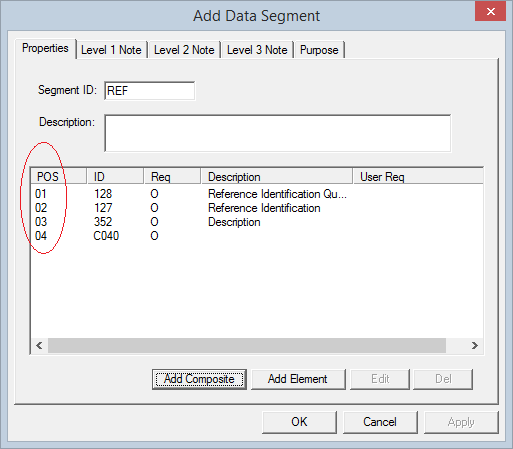
When adding elements to a segment, pay special attention to the element position making sure that they are the same as the guideline. (Create a dummy element if you have to to maintain the element position if an element for that particular position has not been provided.)
-
After having created all the segments required for the Transaction Set, the next step is to lay them out in the Transaction Set Directory (.SETS) exactly as how the guideline you are following has it. Pay special attention to the Area and Loop Section of the data segment for these are properties that can be used to uniquely identify a particular data segment.
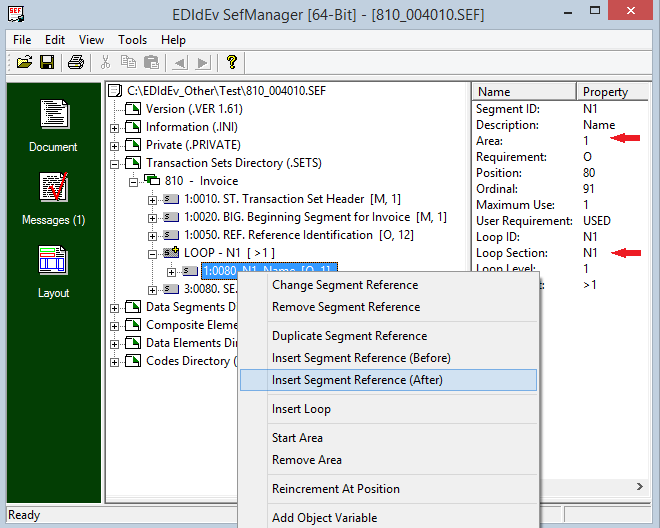
-
Regularly save your work by clicking on the Save icon (or File, Save).
-
For more on editing a SEF file with the SEF Manager, please visit https://www.edidev.com/articles/CreatingIG/fredi_create_ig.html
Creating a SEF file from scratch
Click here to evaluate the Framework EDI

